Sorry if this bugs my few regular readers that enjoy the aerial photos. My New York to Las Vegas photos didn't turn out as planned. I couldn't get them to color correct. I'm slowly figuring out the nuances of taking photos through Airbus windows. Unfortunately I can't figure out how to remove the color cast from the windshield when there is haze in the air. On a clear day removing the color cast is easy -- add some yellow and red in LAB colorspace. With haze in the air the color cast is not even across the frame and global adjustments don't work. Which brings me to today's photo and a color cast that I know how to fix.
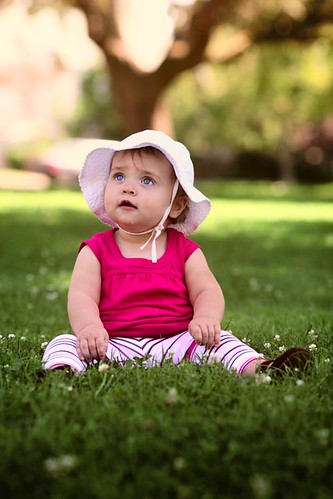
I took this picture of Ella in the shade of a tree. The original had a nasty blue color cast. Shade on a sunny day is always blue because shady areas are lit by the diffuse light reflected out of the blue areas in the sky. To remove the blue I went into LAB colorspace and created an curves adjustment layer where I moved the B channel more towards yellow. To make this change only effect the shady blue cast parts of the photo I built a mask based on a high contrast, inverted, duplicate of the B channel. Pretty tricky huh? If you want to learn how to do this type of thing check out The Canyon Conundrum by Dan Margulis.
Tuesday, September 30, 2008
At the Park Again
Video Shot With Canon 5D Mark II
Here is yet another reason to lust after the new Canon 5D Mark II. Check out this HD video shot with the 5D Mark II. The video was created by photographer Vincent Laforet.
And because Vincent Laforet is having a hard time drumming up traffic for his blog here is a link. There are some really interesting behind the scenes videos there.
And because Vincent Laforet is having a hard time drumming up traffic for his blog here is a link. There are some really interesting behind the scenes videos there.
Monday, September 29, 2008
The Power of Indy Rock
Since when does indy rock get involved in presidential politics? I'm not sure that a single Wilco fan would have voted republican anyways. I suppose you have to rally the base. Whatever the motivation, I think this is the coolest Youtube video I've ever seen. Barak Obama and Jeff tweedy on the same stage -- how awesome is that?
Western Colorado
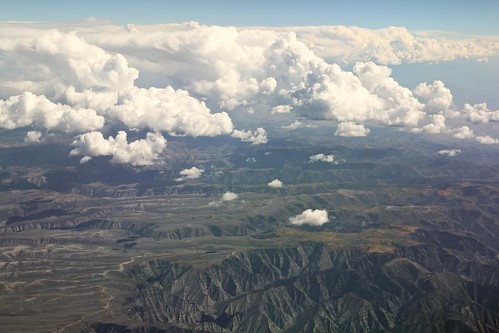
This photo was taken about 80 miles further east than my last post. This is western Colorado near Dinosaur National Park. Notice the bright fall colors on the edge of the plateau. Some small thunderheads were forming in this area and we were doing a lot of dodging and weaving to keep our passengers in the smooth air.
For a closer look at the fall colors check out this huge version.
Sunday, September 28, 2008
Desolation
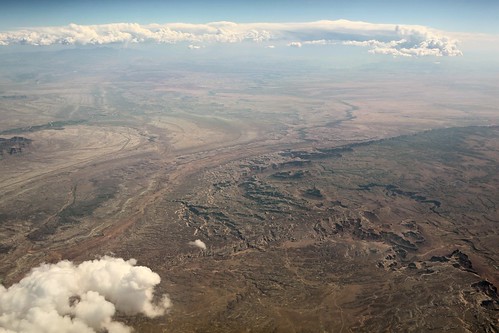
This photo was taken in eastern Utah. I think this area might be the most desolate area in the lower 48 states. Other than a road, there are no signs of human deveoement in this swath of desert.
This picture was taken on the same flight as the photo in my previous post. I have one more good photo from that flight to edit, and then I got a whole bunch more that I took yesterday while flying from New York to Las Vegas. If you're an nature photographer living in Colorado I recommend going outside this weekend. The leaves in the Rockies looked like they are at there peak.
For all the conspiracy theroists and Ron Paul supporters here is a link to a large size version of this photo. You'll notice there is plenty of space for you to build a compound and the IRS will never find you. Here is a name recomendation; "Freedom Canyon".
Friday, September 26, 2008
35,000 Feet Above Zion National Park

Here is a new aerial view hot off the sensor of my Canon 5D. This is Zion National Park in Southern Utah. I took this while en route from Los Angeles to New York City. If you want to take a closer look at the canyon see this nearly 100% size view.
There were great clouds and lots of breaks in the haze as we cruised over the desert southwest. I could see lots of bright fall colors on some of the higher peaks.
It's getting late and I have an early van tomorrow so there is no time for more photos tonight. Maybe I'll get some more stuff edited and posted in the coming days.
Thursday, September 25, 2008
Advantage Raw Files
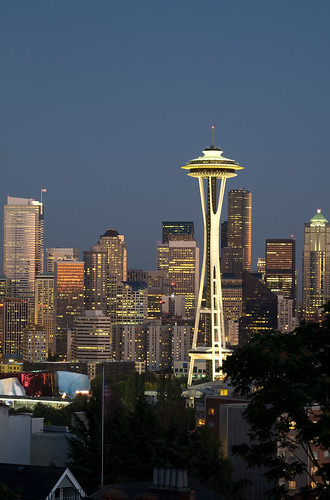
Today I dug through some of my Seattle photos from a week ago. This one seemed worthy of editing and uploading to istock. Lately I have been shooting in jpeg format because my hard drive is bursting at the seams. When shooting Seattle I shot in raw because I figured the night time photos would require a lot of editing and raw would offer more flexibility
While completing the edit work on this file I realized why I like shooting in Raw.
1) Color correction in raw is easy. The raw conversion dialog box in Photoshop is faster and easier to me than creating a color correction layer later in the edit.
2) Using raw you can keep the image in 16 bit mode for the entire edit. When I open a raw file I make sure to open it in 16 bit format (check the box at the bottom of the raw converter to open in 16 bit mode). A normal jpeg is an 8 bit file. Editing in 16 bit means there are less rounding errors/changes for each photoshop adjustment you make. 16 bit files seem to hold up a lot better when I do heavy duty edits.
Subscribe to:
Posts (Atom)
